If you’re new to AI art and want to learn how to build clear, powerful prompts, this guide is for you.
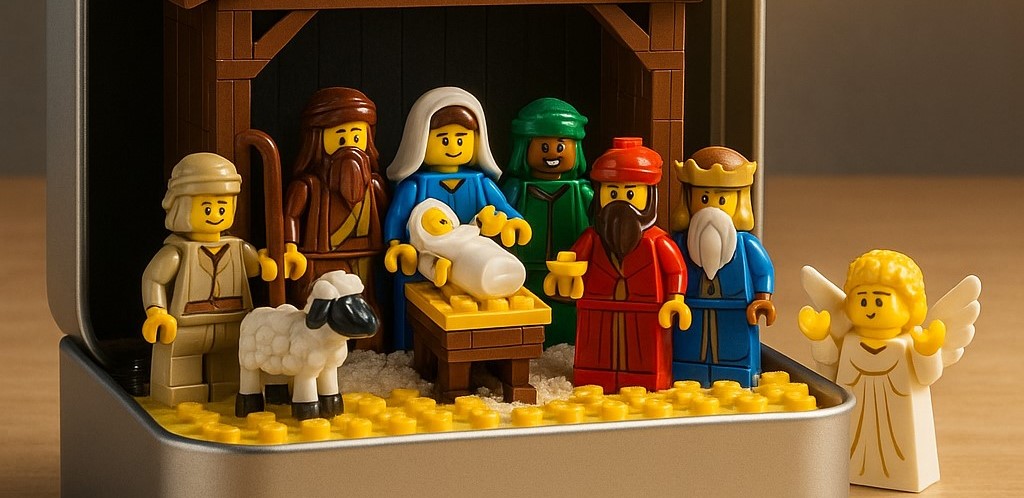
In this tutorial, we’ll walk step-by-step through how to create a photo-realistic LEGO nativity scene, similar to the example image above.
By the end, you’ll understand how to structure prompts, how to build them up piece by piece, and how each prompt category shapes the final image.
This guide is perfect for complete beginners and is optimised for anyone searching for:
- how to write AI art prompts,
- AI art for beginners,
- LEGO AI art tutorial,
- step-by-step AI prompt building.
[Refer to my full AI art prompt guide for a full description of how to build up perfect prompts for creating brilliant AI art: https://techandai.org/how-to-write-ai-art-prompts-for-beginners-the-complete-guide/]
Lets create this picture.

Step 1 — Start With the Subject
The subject is simply what the image is about. Keep it clear and concrete.
Subject Example
A LEGO nativity scene inside an open metal tin
This tells the AI what the main focus should be. At this stage we avoid style, lighting, or detail—we just define what exists.
Step 2 — Add the Setting
The setting gives context and environment. Where is the subject placed? What surrounds it?
Setting Example
A small manger scene made from LEGO minifigures, with Joseph, Mary, baby Jesus, shepherd, sheep, three wise men, and an angel. The tin is placed on a wooden table, and a golden star is above the manger.
Now the model knows the components and arrangement.
Step 3 — Choose the Style
The style determines how the image looks. For a realistic product-style image like the example, we choose:
Style Example
Hyper-realistic 3D render, studio photography look, sharp detail, soft shadows
This ensures the LEGO pieces appear solid, shiny, and real.
Step 4 — Add Colours & Lighting
Colours and lighting are where the magic happens. They define mood and atmosphere.
Colours / Lighting Example
Warm golden sunlight coming from the top right, gentle glow on the tin, soft reflections on the LEGO plastic, bright yellow star, natural wooden tones in the table
Lighting is one of the biggest factors in making AI art feel real.
Step 5 — Add Textures & Details
This is where your image becomes rich and believable.
Textures / Details Example
Light snow on the wooden roof of the LEGO stable, realistic plastic LEGO textures, smooth metal surface on the tin, tiny LEGO studs visible on the ground
Textures convince the viewer that the image could exist in real life.
Step 6 — Add Camera & Mood (Optional)
These optional extras improve realism and presentation.
Camera / Mood Example
Shot with a macro lens, shallow depth of field, warm festive mood
A macro lens helps emphasise small details—perfect for LEGO scenes.
Final Full Prompt (All Parts Combined)
Here is the full final prompt, built using all six categories:
[Subject]
A LEGO nativity scene inside an open metal tin, featuring Mary, Joseph, baby Jesus, shepherd, sheep, three wise men and an angel.

[Setting]
The tin is sitting on a wooden table. A wooden LEGO stable stands inside the tin with snow on its roof, and a bright yellow LEGO star is mounted above. Golden sunlight beams from the top right corner.

[Style]
Hyper-realistic 3D render, product photography style, ultra-sharp details, soft cinematic shadows.

[Colours / Lighting]
Warm golden tones, soft highlights on the metal tin, realistic plastic shine on the LEGO bricks, gentle glow around the star, natural wood colours.

[Textures / Details]
Visible LEGO studs, realistic plastic surfaces, delicate snow texture on the stable, smooth metal of the tin, subtle reflections on the table.

[Camera / Mood]
Macro camera lens, shallow depth of field, cosy festive atmosphere.
Copy and paste this into your AI art generator and you’ll get a result extremely close to the image shown.
Final Tips for Beginners
- Start simple – Focus on the subject first.
- Add one category at a time – It keeps your prompt clean and predictable.
- Lighting and texture make images pop – Don’t skip them!
- Use optional categories to refine mood – They’re small additions with big impact.
Instagram: https://instagram.com/Tech__and__ai